Uploading Fabrics & Materials
Upload materials one at a time using the simple step-by-step interface.
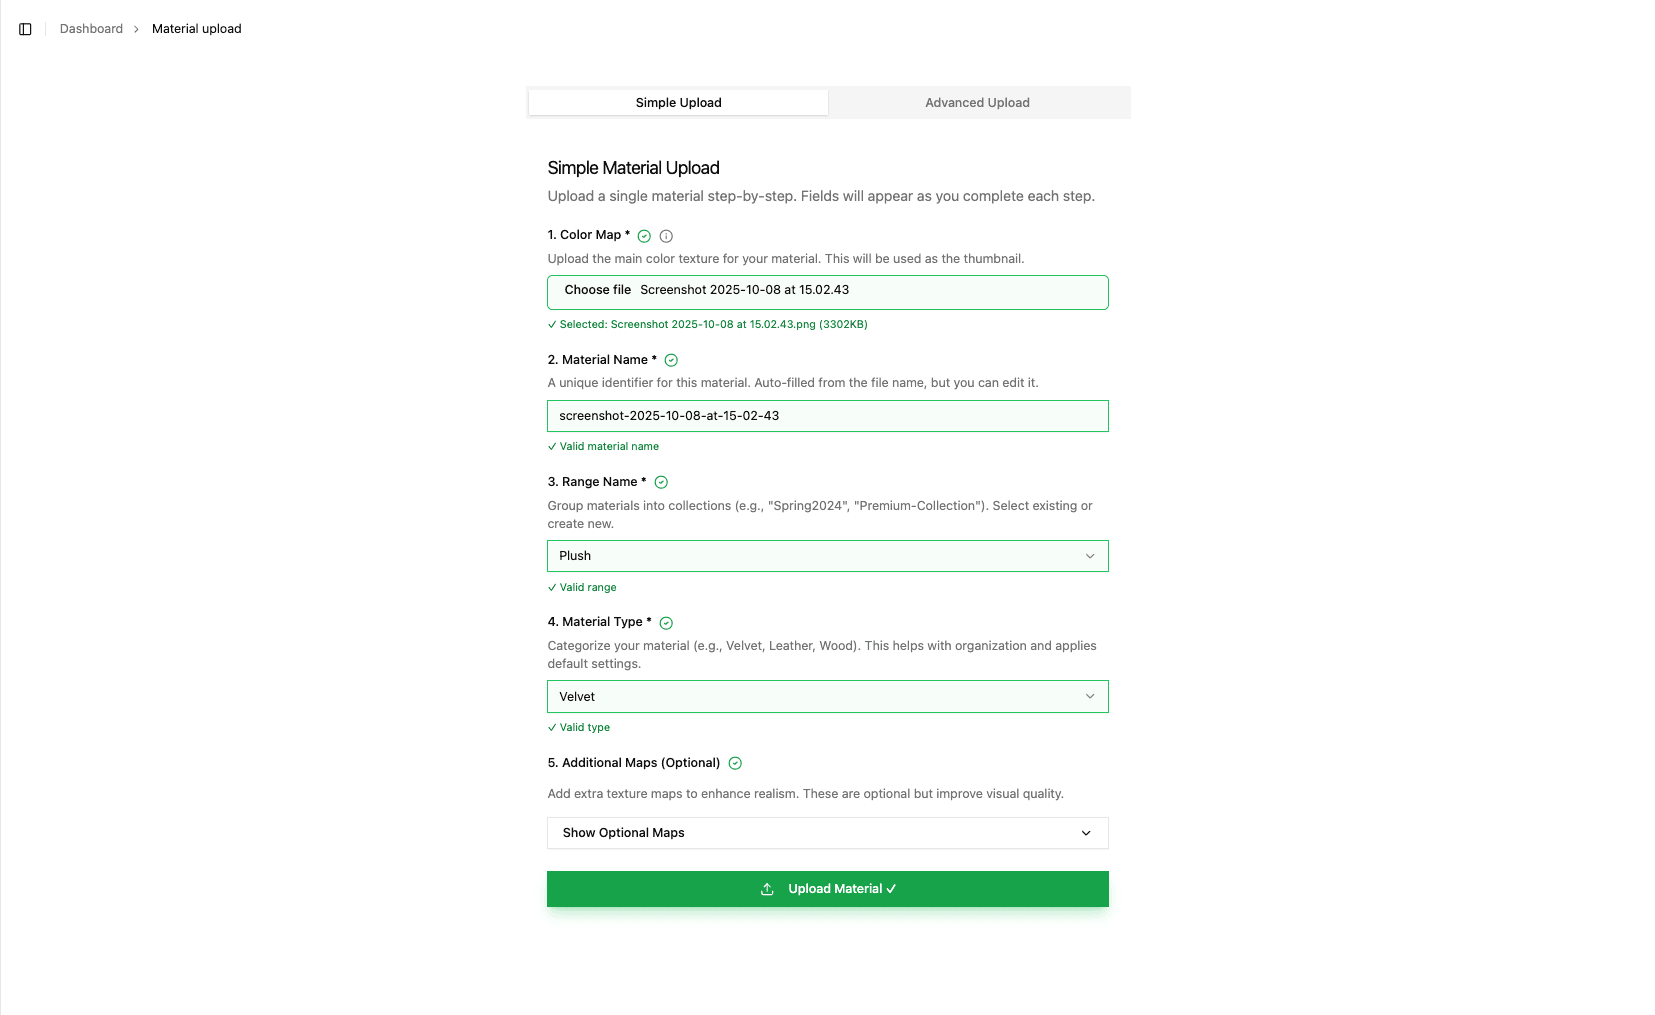
The simple material upload is designed for uploading individual materials quickly and easily. It guides you through each step, revealing fields as you complete them.
🚀 Getting Started
Navigate to the material upload page:
📋 Upload Steps
1️⃣ Upload Color Map (Required)
The color map is the main texture showing your material's appearance. This is the only required file.
💡 Note: The color map will be used as the material's thumbnail
2️⃣ Name Your Material
After uploading the color map, the system will auto-generate a material name from your filename. You can edit this to your preference.
Naming rules:
- ✅ 3-50 characters
- ✅ Letters, numbers, hyphens, and underscores only
Examples:
3️⃣ Select or Create Range
Ranges are collections that group related materials together.
You can either:
- 📂 Select an existing range from your organization
- ➕ Create a new range by selecting "+ Create New Range"
Range naming rules:
- ✅ 2-50 characters
- ✅ Letters, numbers, hyphens, and underscores only
Examples:
4️⃣ Select or Create Type
Material types help categorize and organize your materials. The type also determines which default material configuration is applied during 3D setup.
Common types include:
You can select an existing type from your range or create a custom one.
Type naming rules:
- ✅ 2-30 characters
- ✅ Letters, numbers, hyphens, and underscores only
5️⃣ Add Optional Maps (Optional)
To enhance realism, you can add additional texture maps:
🗺️ Normal Map (NRM)
Adds surface detail and depth without additional geometry. Shows bumps, scratches, and fine surface texture.
✨ Roughness Map (ROUGH)
Controls how smooth or rough the surface appears.
Black = smooth/shinyWhite = rough/matte
💎 Specular Map (SPEC)
Controls reflectivity and highlights. Determines how light bounces off different areas of the material.
👻 Alpha/Transparency Map (ALPHA)
Controls transparency.
Black = transparentWhite = opaque
Useful for materials with holes or semi-transparent areas.
🏔️ Displacement Map (DISP)
Adds geometric detail by actually displacing the surface. Creates more realistic depth than normal maps alone.
All optional maps follow the same requirements:
✅ Validation & Upload
The form validates your input as you go:
- ✅ Green checkmarks appear when each step is completed correctly
- ❌ Invalid entries show helpful error messages
- 🔒 The upload button activates only when all required fields are valid
When you click "Upload Material", the system will:
📱 Next Steps
After uploading, your materials will appear in the All Materials page where you can:
- 👀 View setup status
- ✏️ Edit material properties
- 🗑️ Delete materials if needed
- 🎨 Build them in 3D
🚀 Ready to make your materials look photorealistic?
Continue to building materials in 3D.
💡 Need Bulk Upload?
If you need to upload many materials at once, check out the Advanced Upload method which supports folder-based batch uploads.