



Use Swatches to choose the physical samples customers can order.
A swatch is a physical sample of a fabric or finish. To show or hide fabrics on products, use fabric visibility.
Make a sample available
Swatches come from the selections already used in your product configurators. Some accounts start with a manufacturer list; others open their own options directly.
- Open Swatches.
- If you see a manufacturer list, choose the manufacturer.
- Choose an option, such as Fabrics.
- Search for the fabric by name.
- Choose the fabric to open its details.
- Turn on Available as swatch.
The switch saves immediately. You can also use the switch beside the fabric in the list. The sample must be enabled, and Enable swatch ordering must be on, for customers to order it through your website integration.
Stop offering a fabric sample
This stops physical sample ordering for that fabric. It does not hide the fabric from product choices.
- Open Swatches.
- Choose the manufacturer, if shown, then Fabrics.
- Search for the fabric and open its details.
- Turn off Available as swatch.
- Wait for Swatch disabled.
The switch saves immediately. You can also turn it off beside the fabric in the list. Turn it on again to offer the sample again.
Pause all sample ordering
- Open Swatch settings, using the settings button beside the Swatches heading.
- Turn off Enable swatch ordering.
This saves immediately and stops sample ordering across your account. Turn it back on to resume ordering for enabled samples.
Add a description or SKU
Give customers a useful description and set a separate SKU for the physical sample.
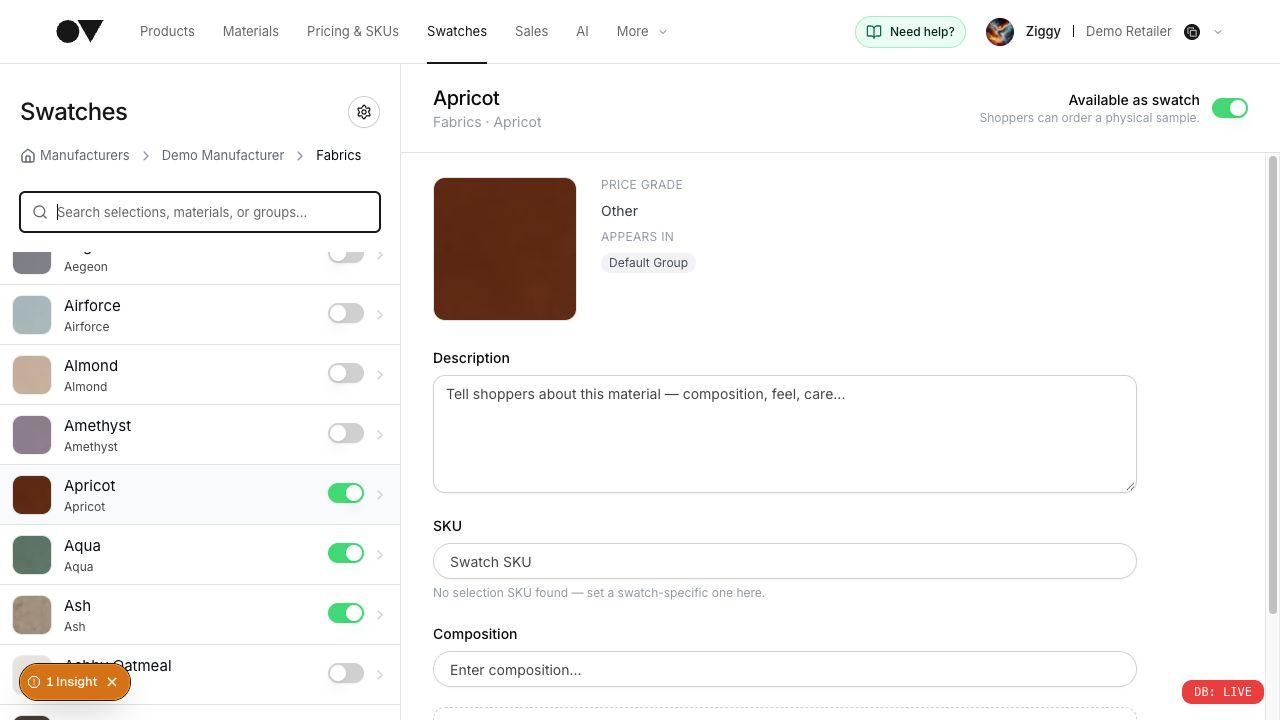
Apricot is already enabled in this example. The details panel shows its price grade and the fields you can edit.
- Open an enabled sample.
- Enter a Description.
- Enter a sample-specific SKU, if needed.
- Choose Save changes.
Wait for Swatch saved. The button then shows Saved. These text changes do not save when you type them.
The SKU initially uses the selection's SKU when one exists. Editing it sets a separate SKU for the physical sample. See Pricing & SKUs for product SKU setup.
The panel also shows the sample's Price grade and the groups where it Appears in. A sample can have more than one price grade when product pricing differs.
Set free and paid sample limits
Open Swatch settings, using the settings button beside the Swatches heading.
| Setting | What it controls |
|---|---|
| Enable swatch ordering | Whether customers can order physical samples. |
| Free limit | How many samples are free in an order. |
| Price after (£) | The price of each sample above the free limit. |
| Min per order | The fewest samples a customer can order. |
| Max per order | The most samples a customer can order. |
| Allow paid extras beyond free limit | Whether customers can order more than the free limit, up to the maximum. |
For example, to offer three free samples and charge £0.50 each for up to three extra samples:
- Turn on Enable swatch ordering.
- Set Free limit to
3. - Set Price after (£) to
0.50. - Set Min per order to
1. - Set Max per order to
6. - Turn on Allow paid extras beyond free limit.
Press Enter after each number, or click outside its field, to save it. Switches save immediately. There is no separate save button in Swatch settings.
With these example settings, six samples cost £1.50 before any other checkout charges. The ordering rules apply across your account.
Add information to every sample
Use a shared field for information such as care instructions or fabric composition.
- Open Swatch settings.
- Under Swatch fields, enter a name such as
Carein New field name (e.g. Style). - Choose Add.
- Close Swatch settings.
- Open an enabled sample.
- Enter the sample's care instructions in Care.
- Choose Save changes.
Adding the field saves immediately and makes it available on every enabled sample. Each sample's value saves with Save changes.
Removing a shared field hides its values. Description and SKU are built-in fields.
Group and sort the fabric choices
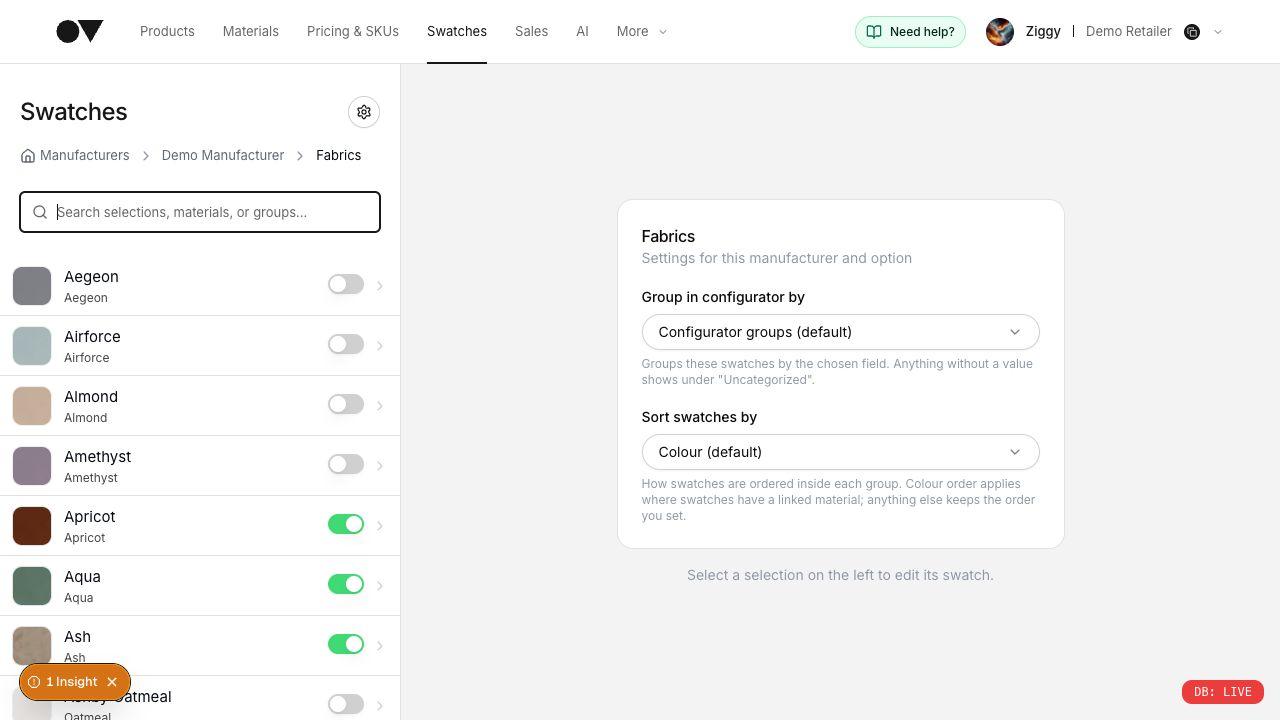
This example shows Fabrics for Demo Manufacturer, using the default configurator groups and colour order. Some accounts open directly at their options.
- Open Swatches.
- If you see a manufacturer list, choose the manufacturer.
- Choose an option, such as Fabrics.
- Choose a value under Group in configurator by.
- Choose a value under Sort swatches by.
These controls appear before you open a sample's details. If details are open, choose the option in the breadcrumb above the list. Each grouping or sorting change saves immediately.
| Grouping choice | Result |
|---|---|
| Configurator groups (default) | Keep the existing configurator groups. |
| Price grade | Show the cheapest grades first. Individually priced selections appear under Other. |
| A shared field, such as Care | Group by that field's values. Samples without a value appear under Uncategorized. |
Colour (default) sorts linked materials by colour. Choices without a linked material keep their existing order. You can also choose Your order, A to Z or Z to A.
These display settings apply to the chosen manufacturer and option. They do not change product prices or make additional materials available.
Connect samples to your website
Your website integration must display the samples and support sample ordering. Follow the integration guide for your website.